


How to Show Amazon & Custom Products Together in WordPress?


If you sell or recommend products from more than one place, getting them onto the same page in WordPress is harder than it should be.
Your Amazon picks show up in a product box, but products from eBay, Etsy, or your own store usually end up as plain text links. Put them side by side, and the page looks patched together.
There’s a simpler way. With AzonPress Product Collections, you add Amazon products and custom products to one list, choose a grid, list or table layout, and place that list on any post or page with a shortcode or a block. Every product gets the same design, no matter which store it comes from.
This guide walks you through setting up your first collection step by step. It also covers where mixed product lists work best and how to get more clicks from them.
TL;DR
What is a Product Collection in AzonPress?
A Product Collection is a saved, reusable list of products in AzonPress. You choose the products once, then show the same list on as many posts and pages as you like. One collection can combine Amazon products and custom products, up to 100 products in total.
The important part is how it stores products. A collection never copies product data. It points to each product where it already lives. Edit a product’s price, image, or link, and every collection containing it shows the new version.
Custom products are products you add to AzonPress yourself, with your own link. They can come from eBay, Etsy, your own online store, or the checkout page for an ebook or template you sell. You can add custom products without the Amazon API, which is what makes mixed lists possible.
What You Get With Product Collections
Build the list once, place it anywhere: Create a collection, copy its shortcode, and paste it into any post or page. There’s no rebuilding product boxes or searching for the same ASINs again.
Edit a product once, and every list updates: Since collections point to products instead of copying them, your edits reach every placement right away. Fix a link in one place, and it’s fixed across your whole site.
Amazon and your own products in one list: This is where collections differ from a typical Amazon product box. A single list can hold:
- A food blogger’s Amazon kitchen picks next to her own meal-planner printable
- A tech reviewer’s Amazon favorites next to a refurbished option on eBay
- A creator’s ebooks and templates next to the tools she recommends to readers
- Picks from affiliate programs beyond Amazon, added as custom products
Every product gets the same design, so the list reads as one recommendation instead of a mix of styles.
A different layout for each placement: Show a collection as a 3-column grid in your main guide, a short list inside a review, and a table in a comparison post. The saved collection stays the same. Only that one placement changes.
Labels that belong to the list: Give any product its own title, a badge like Best Pick, or custom button text inside a collection. These labels apply only to that collection. The original product stays untouched, so the same product can be “Best Budget Pick” in one list and “Editor’s Choice” in another.
A consistent affiliate disclosure: Choose the global disclosure, write a custom one, or turn it off for collections that only hold your own products. Basic HTML works, and the %last_update% tag shows readers when you last saved the list. If you need wording ideas, see these Amazon affiliate disclosure examples.
Broken products hide themselves: A product stays hidden on your site in three cases:
- You deleted it
- Amazon stopped returning it
- Its link was flagged as broken
Readers never see a dead box. You get a warning next to the product in the collection editor, so you know exactly what to fix or remove.
Click data for the whole list: Each collection shows its clicks from the last 30 days, broken down by page and by product. You’ll see which posts send the most clicks and which picks readers actually choose.
Keep in mind that clicks show interest, not completed sales. For the full picture, see our guide to affiliate link tracking.
Where Product Collections Work Best
- Holiday gift guides: Build one guide and reuse it in every seasonal post, then retire it in one step after the holidays.
- “Best of” roundups: Keep your top picks for a category consistent across the main roundup and related reviews.
- Recommended gear or resources pages: One list you update as your picks change.
- Related picks inside reviews: Show three alternatives at the end of a review without building a new box each time.
- A creator shop section: List your own ebooks, templates, or printables next to the tools you recommend, all on your own WordPress site.
Get access to our exclusive offers and pro tips!
Tutorial: Steps To Create a Product Collection in AzonPress
Before you start, make sure you have:
- AzonPress installed on your website.
- The Amazon Creators API connected, if you’ll add Amazon products. Here’s how to set up the Amazon Creator API.
- Your custom products, if you add any. You can add them first, or create them while building the collection.
Step 1: Create the Collection
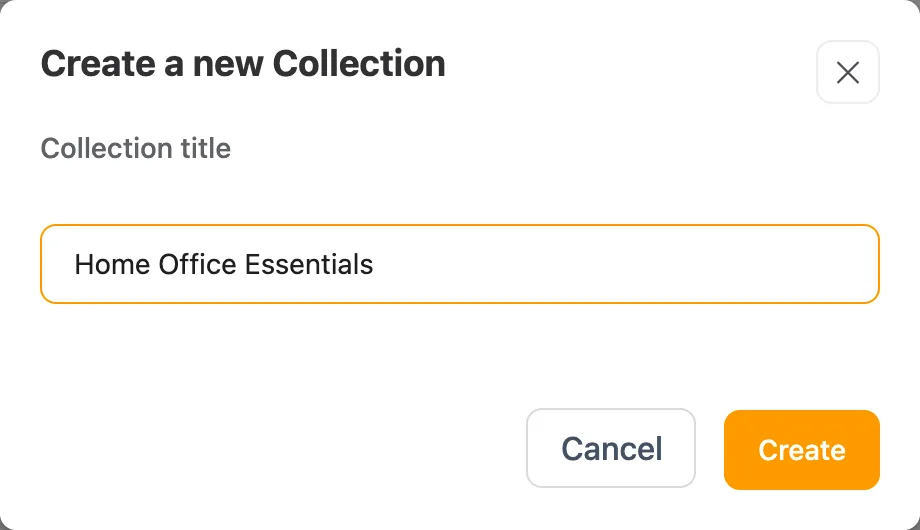
In your WordPress dashboard, go to AzonPress → Collections and click Add New Collection. A small pop-up opens.
Enter a Collection title, such as Home Office Essentials, and click Create. The new collection opens in the editor.
Step 2: Add Amazon and Custom Products
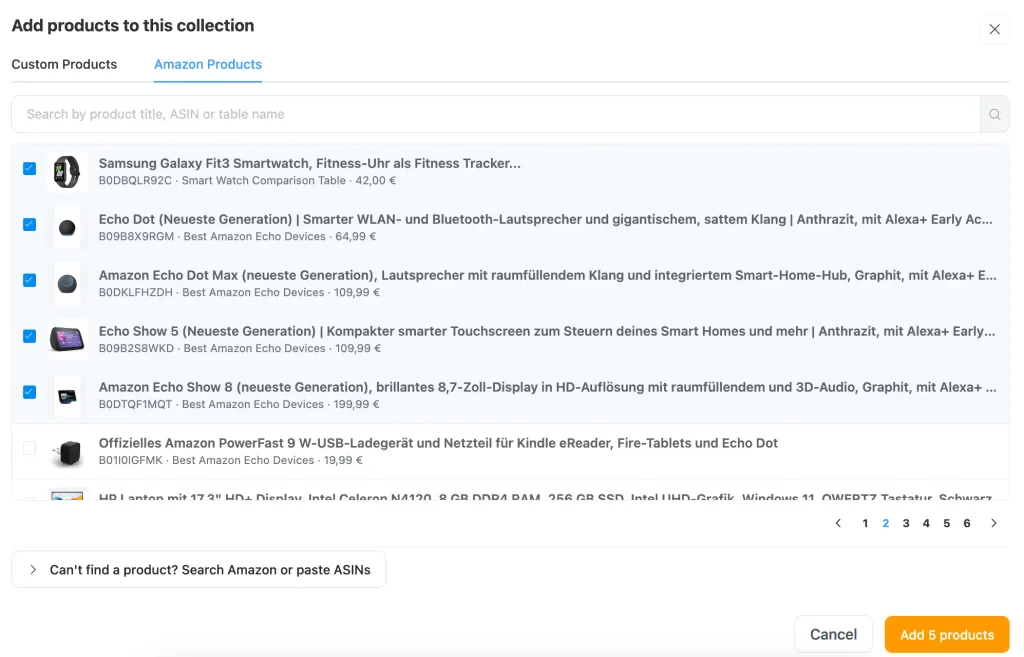
Click Add Products. You’ll see two sources:
- Custom Products. Search by product title or template title.
- Amazon Products. Search by product title, ASIN, or table name. You can also paste a batch of ASINs, one per line or separated by commas.
If the product you need doesn’t exist yet, click Create custom products and add it on the spot.
Tick the products you want, then click Add products. You can add from both sources to the same collection.
Step 3: Arrange the List
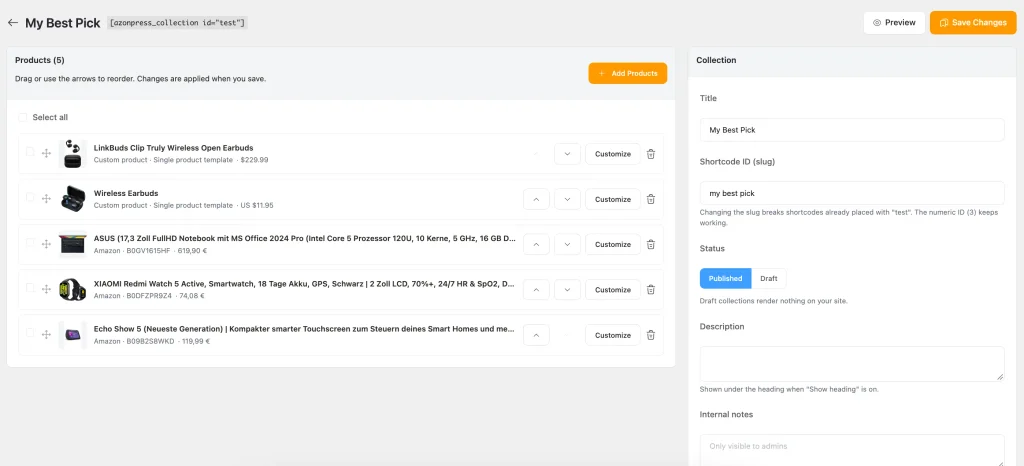
- Reorder: Drag a product to a new position, or use the Move up and Move down buttons if you prefer the keyboard.
- Remove: Click the trash icon next to a product. To remove several at once, tick them (or select all) and click Remove selected. This only removes them from the collection. The original products stay in AzonPress.
- Customize: Click Customize next to a product to set its own Title, Badge, or Button text for this collection only.
Put your strongest picks at the top. When you show a shorter version of the list later, AzonPress shows products from the top down.
Step 4: Add the Collection to a Post or Page
In the Collections list, click the shortcode of a collection to copy it, then paste it into any post or page:
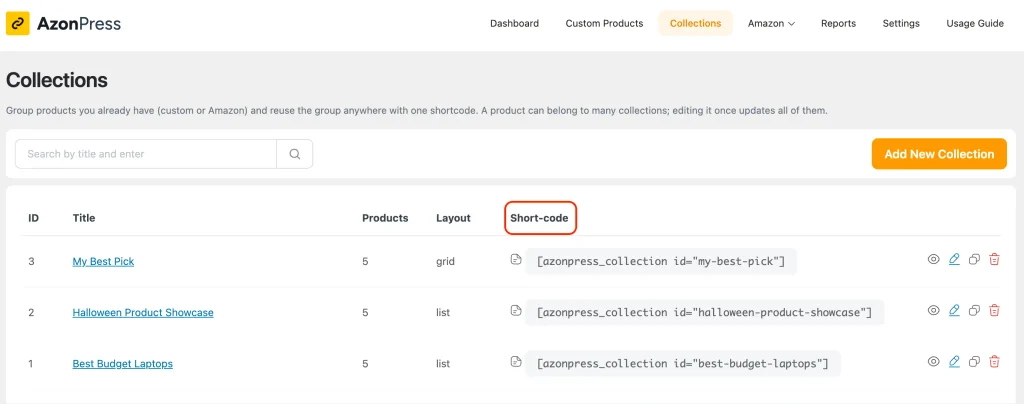
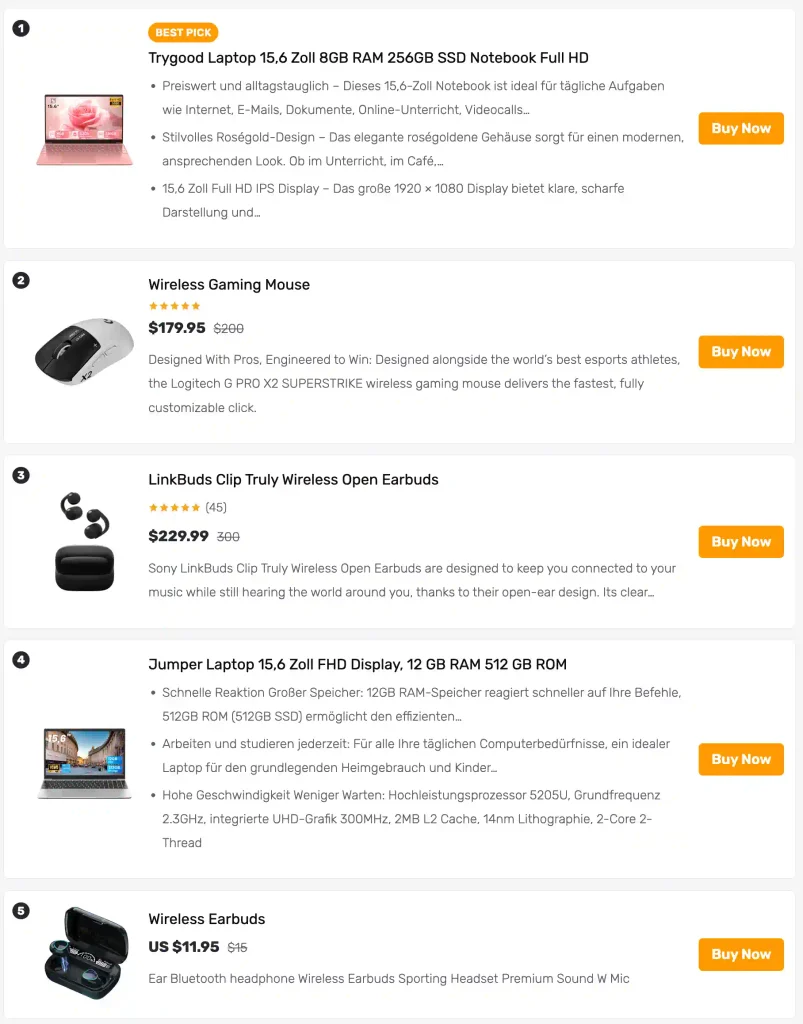
Your Collections list may look like this on the front end.
Step 5: Check the Collection’s Click Stats
Open the collection in the editor to see Clicks (last 30 days):
- By page shows which posts and pages the clicks came from.
- By product shows which products in the list get chosen most.
The same collection and page data also appears in your site-wide click analytics.
Put All Your Product Picks in One Place
You don’t need separate setups for Amazon products and the ones you sell or recommend from other stores. Build one collection, add the products that belong together, and place it wherever your readers need it.
Start with a list you already repeat, like a gift guide or your top picks for one topic. Set it up once, and the next price change takes one edit instead of ten.
And if you want your Amazon picks and your own products to look like they belong on the same page, add them with AzonPress Product Collections. Your readers came for your recommendations. Show them all in one clean list.
If you get stuck anywhere, drop a comment below. I’m always happy to help.
Thanks for reading!





Read Similar Blogs
We build lasting partnerships to boost and manage revenue growth




Leave a Reply